Skip to content


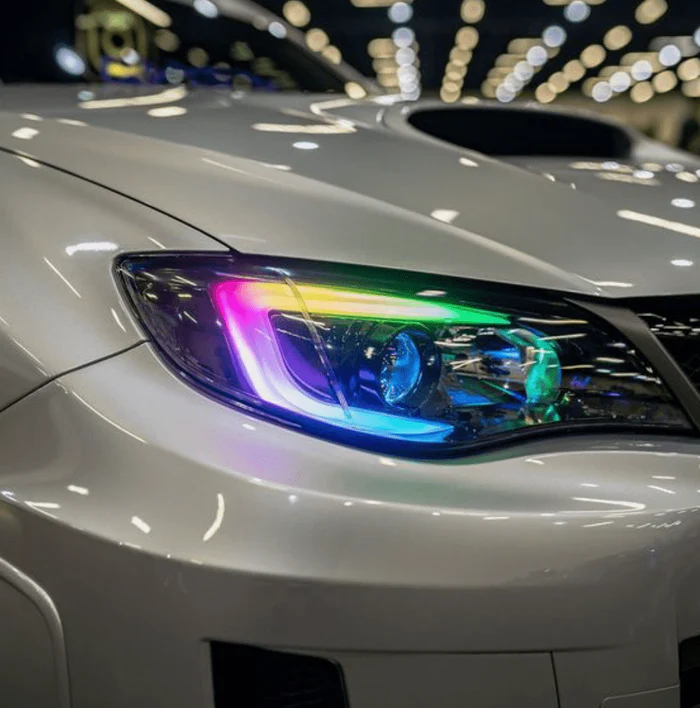
Welcome to our comprehensive installation guide for Flexible DRL Tube Strips! Enhance the style and visibility of your vehicle with these versatile and dynamic DRL tube strips. Follow our detailed instructions for a seamless installation process, allowing you to customize your vehicle's appearance while improving safety on the road.

Product Link
Flexible DRL Tube Strips | Multicolor – RGB Halo Kits
Step 1: Test your Product. This ensures no manufacturing defects are in the LEDS, and that you understand how to wire your product properly. See the wiring guide that comes with your product or visit our wiring guide (RGBW/ RGBWA and Flow / Color Chasing)
Step 2: Remove your bumper to access headlights. (The process of accessing the headlight may differ depending on the vehicle. This step may or may not be necessary for your specific vehicle. For tailored instructions, you can consult our help center or search the web for vehicle-specific guidance on how to proceed.)
Step 3: Open your headlights. (*Headlights can be safely opened and resealed using the process outlined in the video below)
Step 4: Install your LED Product into your headlights.
We are currently in the process of creating a video installation guide for this product. In the meantime, if you need any assistance during the installation process, don't hesitate to reach out to us. We're here to help! In the meantime, please check our wiring guide.
Step 5: Reseal your headlights (see video above) or click here for full guide.