Skip to content


Transform the interior of your vehicle with our comprehensive Flow Series Interior Fiber Optic Kit Install Guide. Elevate both style and ambiance effortlessly with step-by-step instructions tailored for seamless integration, ensuring your vehicle's interior shines brightly with dynamic lighting effects.

Product link:
Installation
Step 1: Power your wire harness using any 12v positive and ground connection or use the included cigarette lighting power adapter (red to red and black to black)
Step 2: Install Lights in your desired area by pushing them securely into any gap or split in your interior. You need a squeegee or credit card to help fit the lights in tight areas. It is important to note that lights only bend one way, so be sure to test and keep this in mind when installing. Run wires as well and as cleanly as possible for the best results. Wires can be tucked into cracks and crevices as needed.
Step 3: Each strip is cuttable as needed for best fitment. It can be cut using common household scissors. The strips can be cut after or before any led. If you cut on a led and experience flickering, cut a little more off, and the lights should function as normal. Do not cut off the wire end. Please cut the end away from the wire.
Step 4: Power each strip directly to the wiring harness using the included extension wire and hide wires as best you can.
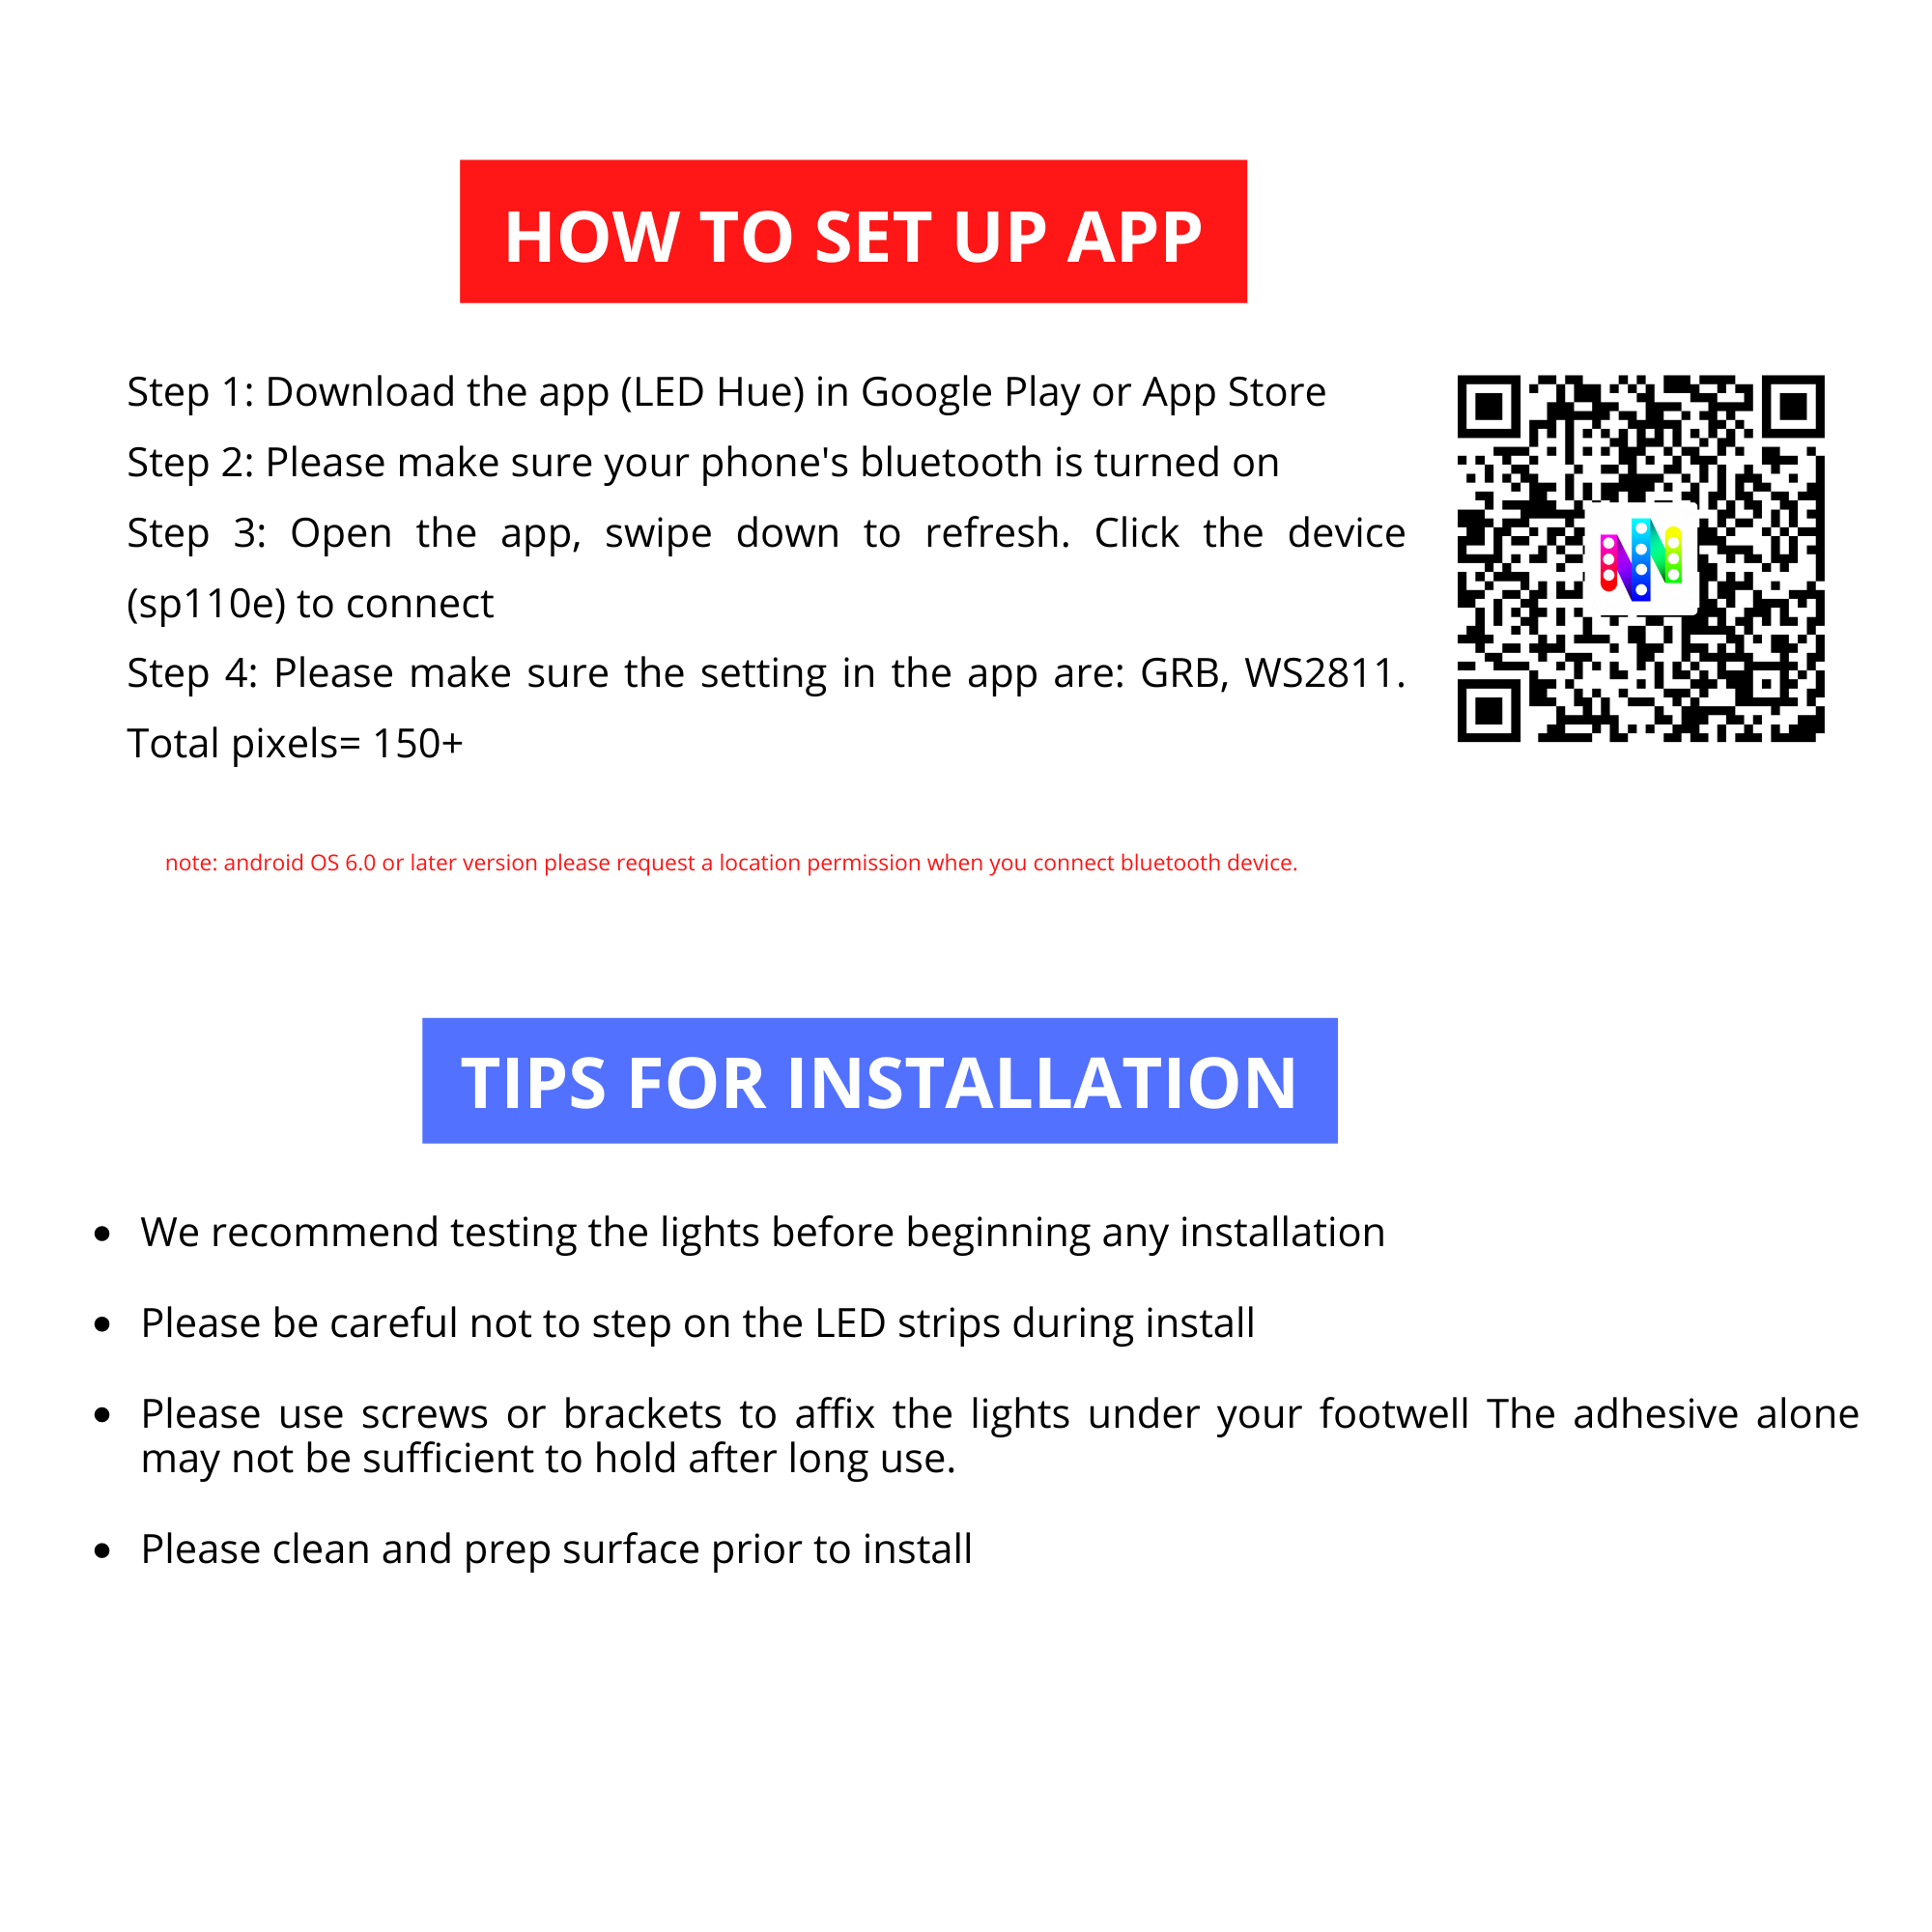
Step 5: Open the app LED Hue to control your lights and enjoy!